Showing posts with label snack. Show all posts

Monday, June 10, 2013

Vazhaipoo vadai

In my childhood days I've heard in songs and read in books that the banana tree is a great example for sacrifice as every part of it is consumed by humans. I would sometimes wonder if it is the tree's sacrificial nature to give out everything or the humans' selfish nature to get as much as we can. Philosophies apart, since the banana tree has a use in every bit of it, every house which has a garden space would have a banana tree. Even if it doesn't yield fruits, we can always use its leaves for serving or packing food, or use the trunk and flower in cooking. I remember  growing a banana tree in our house and waiting for it to yield fruits which seemed like a lifetime. I also remember the size of the fruits were nowhere near to the size of the smallest variety of banana. But the taste of something grown in our own garden is definitely better than the best of what we get in stores. Now...why I am I telling this story? just to explain the fact that the banana flower is edible. It is made as a dry curry as such (poriyal) or with dal (paruppu usili),  or as fritters (vadai). My mom once made this vadai and ever since I am a big fan of this vazhaipoo vadai (but I always wonder why it was purple). The toughest part in this recipe is cleaning the flower. Once you have done cleaning you can make the fritters in no time. You could also clean up the flowers ahead of time, but the flowers starts to darken if not cooked immediately. But they are still edible and doesn't affect the taste or texture of the vadai. The center portion of the flower is also edible and can be eaten raw or cooked,

Things you'll need:
Banana flower (Vazhaipoo) - 1
Channa dal - 1 cup, soaked for 2 hours
Onion - 1, big, Finely chopped
Garlic - 3 pods, minced
Curry leaves - 3 or 4, chopped
Fennel seeds - 1 tsp
Green chillies - 2, minced
Chilli powder - 1 tsp
Turmeric powder - 1/4 tsp
Salt - as required
Coriander leaves - 3 or 4 springs, finely chopped
Oil - for deep frying

Yield - 15 - 20 pieces

Method:

Step 1:
Remove each petal of the flower and collect the small flowers inside. Remove the thin membrane and thick stamen in each small flower. When you have removed as many of the flowers (you could leave the smallest flowers toward the end), chop the flowers and soak them in water with a little turmeric powder until you get the vadai mixture ready.

Step 2:
Coarsely  grind the channa dal, add the rest of the ingredients  and mix well. Squeeze the water out of the banana flowers and add them to the vadai mixture and mix well.

Step 3:
Make small balls of the vadai mixture and flatten them to discs. Deep fry them in medium heat and serve hot with sauce or chutney.


Sending it to Vardhini's Dish it out event


Tuesday, April 30, 2013

Baked Veggie Quesadillas

This is one of my favorite Mexican dishes. It can be either made as an appetizer or main course. It can be prepared plain or with veggies or chicken. There is no hard and fast rules for the filling. You can use your own imagination for the filling and seasoning. The following recipe is for veggie quesadillas.

Things you'll need:
Tortillas - 4
Mexican fiesta cheese blend - 1 lb
Bell peppers - (green and red) 2 cups
Onion - 1, diced
Garlic - 4 cloves minced
Cilantro - few sprigs
Salt and pepper - as required
Fajita seasoning (optional)
Chilli powder - 1 tsp
Butter - as needed

Yield - 8 pieces

Method:

Step 1:
Preheat oven to 350 degrees.
In a pan, heat a little oil and saute onion, garlic and bell peppers with salt and pepper, fajita seasoning, salt and pepper and chilli powder, until the vegetables are almost cooked but still crunchy. Turn off the stove and add the cilantro. Divide the filling into equal parts depending how many tortillas you are using.


Step 2:
Take a tortilla on a paper plate spread some butter on both sides, add one portion of the filling to one half, add required amount of cheese blend, and close the tortilla. Prepare all the tortillas this way.


Step 3:
Spray a baking sheet with non-stick cooking spray or just smear some butter on the sheet, place the quesadillas and bake them until the cheese melts.

Step 4:
Remove the quesadillas from the baking sheet and cut them into half. Serve them with guacamole and sour cream or your favorite dip.


Tips:
You can also make them in a flat pan in the stove.
Make chicken quesadillas by adding cooked and diced chicken to the above mentioned filling.

Tuesday, March 26, 2013

Spinach and artichoke dip

Most of the times when we go out to eat in a local restaurant or diner we would scan through the menu for a long time and end up ordering spinach artichoke dip. This cheesy dip may make u feel guilty at first sight but who cares after the first bite. Think on the positive side...there's spinach..full of iron, vitamins and minerals..and there's artichoke high in antioxidants...and the cheese contains calcium. So a little bit of fat wont hurt right? (if we promise ourselves an extra workout the next day it could even be better). I wanted to try the recipe but I couldn't find a smaller version of the recipe serving 2-3 adults and I was not sure about the measure of the ingredients to make just a little for me and my husband. As days passed I totally lost the motivation.
Me and my friends get together at one of our homes and do potlucks once in a while. We usually do a theme like Chinese, Indian, tiffin, snacks etc.,. For the recent potluck we just ran out of ideas and we decided to make whatever we liked to do. Usually I take the dessert option for all the potlucks but for this one my friend overtook me and she wanted to make dessert (good thing she did..otherwise we would have missed the awesome dessert she made). I was ramming my head for days together to decide my recipe and suddenly it struck me..why not spinach and artichoke dip? So I made spinach and artichoke dip and vegetable quesadillas for the potluck and I am so glad that my friends liked it. It was so much that I still had some to share with my husband for dinner.

Things you'll need:

Spinach - 10 oz (I used frozen spinach)
Artichoke hearts - 14oz can
Parmesan cheese -  3/4 cup
Cream cheese - 4 oz
Mayonnaise - 3/4 cup
Mozzarella - 1/2 cup
Garlic  - 2 cloves, minced
Salt and pepper - to taste

Yield - 10 to 12 servings

Method:
Step1:
Preheat oven to 350 degrees. Chop the spinach finely. If using frozen spinach, squeeze the water out before chopping. Drain the artichoke hearts and chop them finely.

Step2:
Mix the spinach and artichoke with other ingredients in a wide oven-proof dish and combine until the cheeses and the veggies are mixed thoroughly.

Step3:
Bake for 20 to 30 minutes or until you see a brown edging.

Serve with tortilla chips, corn chips or toasted thin bread.


Friday, February 22, 2013

Chicken lollipop

Who doesn't like lollipops? Even my kiddo who is not a big fan of candies like to suck on the lollipop for a couple of seconds.  I remember when me and my sister waiting for the lollipop my father used to get when he returns home from the market on Sundays. OK This is going somewhere else..no, I don't know how to make lollipops. I was trying to make a point that we all love lollipops just because its fun to hold and eat it. It is equally fun with chicken lollipops. In recent times whenever we visit an Indo-Chinese restaurant we end up ordering chicken lollipops just because my kid loves it and gobbles it up without a count. It made me think 'if she likes it so much why not make it at home?". So I decided to give it a try. Surprisingly it is not a very hard thing to make. The tough part is to cut them and make into lollipops which wasn't very hard considering its the first time I'm trying it. Rest all is very easy and you can munch in your lollipops in no time.

Things you'll need:
Chicken wings - 3 (you can make 6 lollipops with three wings)
Chilli powder - 1 tsp
Ginger garlic paste - 1 tsp
Soy sauce - 3 tbsp
Egg - 1
All purpose flour - 2 tbsp
Corn flour - 2 tbsp
Chilli sauce - 2 tbsp
Pepper powder - 1 tsp
Salt - to taste
Garlic - 2 cloves, finely minced
Green onions - 2, finely chopped
Red food color -  2 drops (optional)
Oil - for deep frying

Yield - 6 lollipops

Method:

Step 1:
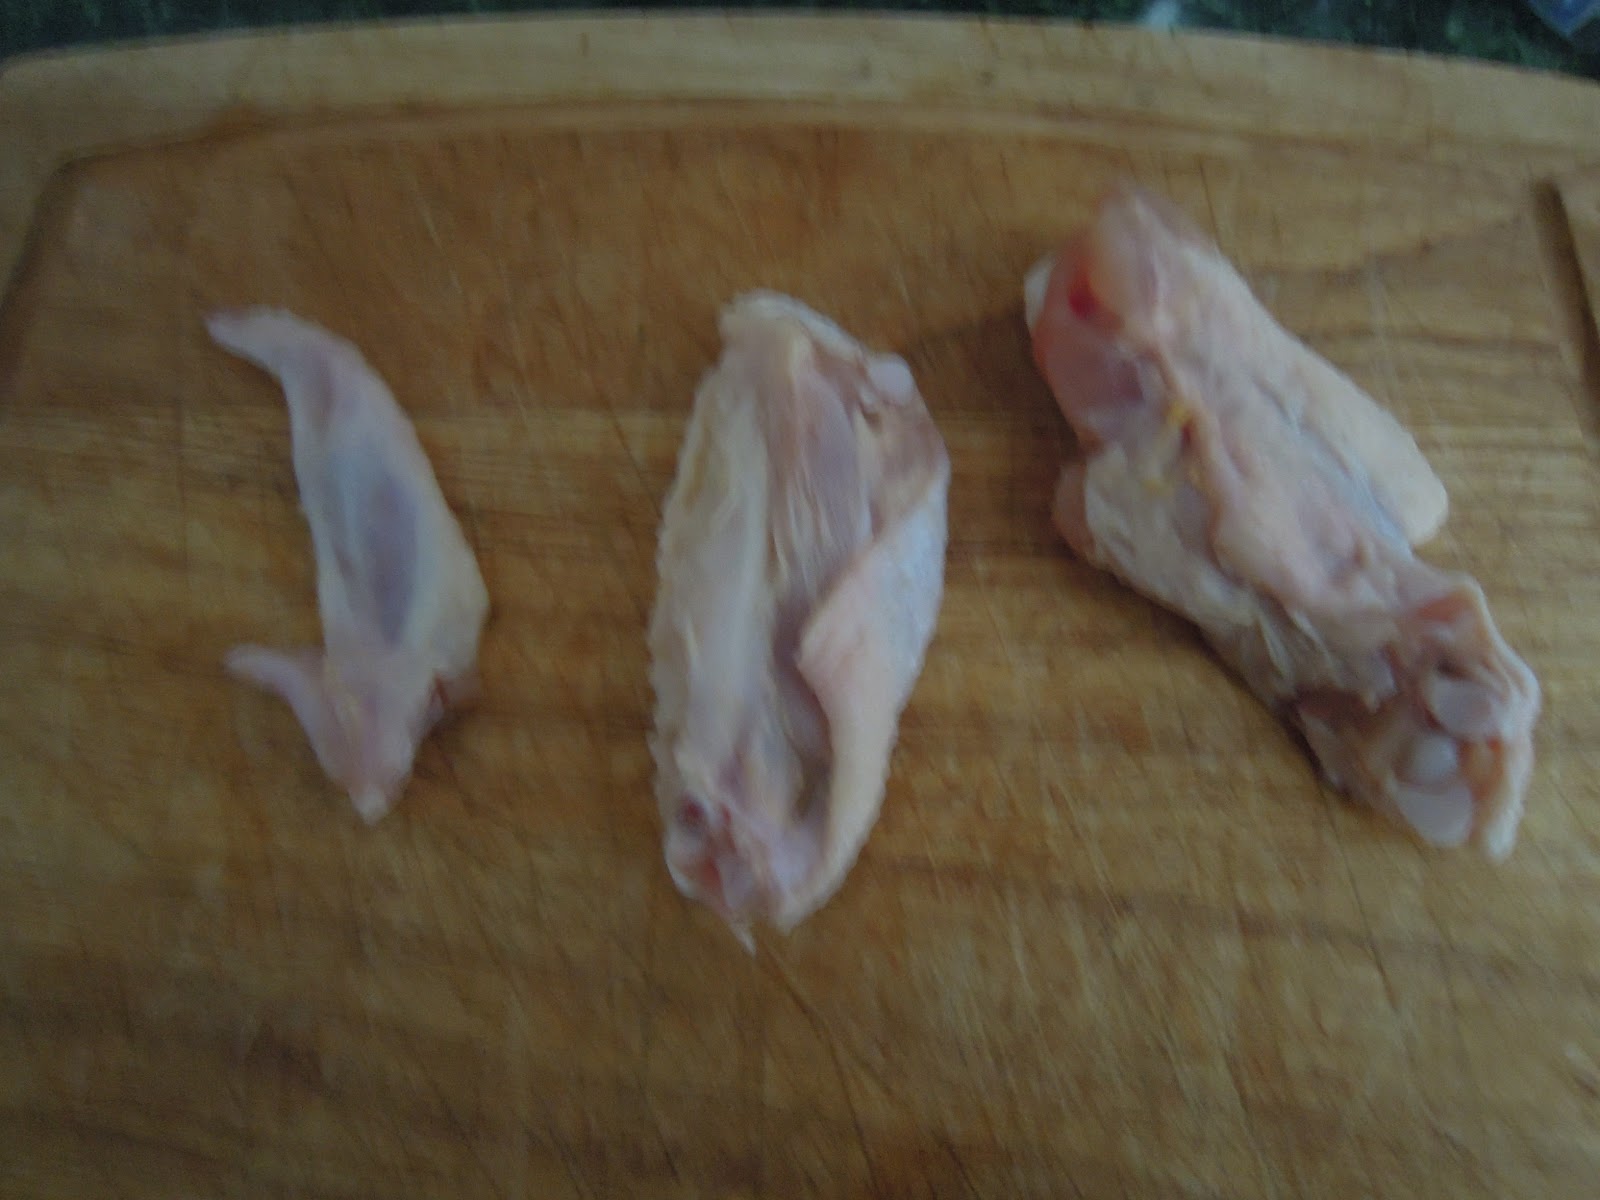
Cut the wings into three parts and discard the end portion. Make lollipops with each wings by cutting the meat at one end of each wing and pushing it towards the other end. Marinate the lollipops with chilli powder, ginger garlic paste, 2 tsps of soy sauce and salt (be careful when adding salt as soy sauce contains salt), and keep aside for 15 mins.


Step 2:
Prepare the batter with corn flour, all purpose flour, egg, 1 tbsp of soy sauce, 1 tbsp chilli sauce, pepper powder, food color and salt.

Step 3:
Heat the oil in a deep pan. Dip the lollipops in the batter and fry them in medium heat. (The heat should be in medium to allow the chicken to cook thoroughly).


Step 4:
Heat 1 tbsp of oil in a pan, saute the garlic and spring onions. Add the remaining soy sauce and chilli sauce and saute for couple of minute. Add a little water or stock mixed with 1 tsp of corn flour to the mixture and stir until it thickens. Add the chicken and mix well.


Garnish with spring onions and serve..get ready to receive the praises..

Friday, July 20, 2012

Vegetable and cheese crepe

For this recipe the credit goes completely to my husband, because he was the one who attempted to try this one, and he makes this each time we feel like having the crepe :). We use Bisquick pancake mix for this recipe but it can also be done with all purpose flour with some baking powder and baking soda. Treat yourself with restaurant style crepe when you are not in a mood for regular food.

Things you'll need:
Bisquick pancake mix/ all purpose flour - 1 cup
Egg - 1 (alternatively you can use 1/3 cup of egg white)
Milk or water - just enough to prepare the batter
Shredded cheddar cheese - 1/4 cup
Onion - 1, small, chopped
Sun-dried tomatoes (optional) - 2 ,chopped
Mixed vegetables (carrot, beans, broccoli, mushroom, peas, bell pepper) - 1 cup
Salt - as per taste
Butter - as required

Yield - 2 Crepes

Method:

Step1:
Prepare the batter by mixing the Bisquick mix/ all purpose flour with milk/water. If using all purpose flour add salt, baking powder and baking soda, a pinch of each.

Step2:
Stir fry the onions, tomatoes (optional) and mixed vegetables with salt and pepper until the vegetables are cooked. Beat the egg with little salt and pepper.


Step3:
Pour a ladle full of batter on a flat pan or tava greased with some butter, in medium flame. Spread the batter into a crepe. When the upper side of the crepe is dry, pour some egg mixture and spread. When the egg is cooked, spread some of the vegetables and shredded cheese. Fold the crepe and serve hot with fries or chips.


Sunday, June 24, 2012

Simple aval (poha) upma

Whenever we have a late and heavy lunch, or if we go somewhere in the weekend and come back late in the evening, we prefer simple and light dinner. Poha upma would be our choice most of the times. I do it with just onions and green chillies or additionally with some veggies if I have the time and the veggies. This make-in minutes meal could also be prepared as evening snacks for kids with veggies and coarsely powdered nuts.

Things you'll need:
Aval (poha) - 1 cup
Onion - 1, finely chopped
Green chillies - 2, finely chopped
Curry leaves - hand full
Vegetables (carrot, peas, potato) - 1/2 cup (If using potato, cook and cube it before adding to upma)
Salt - to taste
Coriander leaves - few sprigs, for garnishing
Cashew nut/peanut powder  (optional) - 2 tsp

For tempering :
Oil - 1 tbsp
Mustard seeds - 1 tsp
Urad dal - 1tsp
Cashew nuts - few, broken
Turmeric powder - 1 tsp

Yield - 2 Servings

Method:

Step1:
Soak the aval (poha) in 3 cups of warm water for half an hour or until it turns soft. Drain and keep aside.

Step2:
Heat oil in a pa and add the tempering ingredients. When the mustard seeds starts bursting, add the onions green chillies and curry leaves. Fry till the onions turn translucent. Add the vegetables and salt, cook them in a slow flame until the veggies are almost cooked.

Step3:
Add poha and fry until the moisture in the poha is absorbed and the mixture is dry. Switch off the stove. Garnish with coriander leaves and nut powder (optional)


Serve with your favorite pickle or chutney (We have it with sweet and spicy mango pickle ) 

Thursday, June 14, 2012

Ragi Adai (sweet version)

Ragi is one of the nutritious grains that we add to our diet in various forms including porridge, idli, dosa,idyappam etc., It can also be had as 'adai' either in sweet or spicy version. I prefer the sweet version because however nutritious ragi might be, I need something to convince me to eat ragi as a main dish. This is very easy to make and would be a quick fix dinner or evening snack. Kids who love sweet (that excludes my daughter) will definitely love this ragi adai.

Things you'll need:

Ragi flour - 1 cup
Jaggery (crushed) - 1/2 cup
Water - 1 cup
Coconut (thinly sliced and chopped) - 1/4 cup
Cardamom - 1 pod, crushed
Ghee - 2 tsp

Yield - 4 or 5 pieces

Method:

Step 1:
Heat the ghee in a pan and toast the coconut pieces until light brown in color. Keep aside. Bring the water to boil and add jaggery. When the jaggery is completely melted, strain the syrup if there are any impurities, and heat the syrup until it comes to a boil. Switch off the stove.

Step2:
 Add the ragi flour slowly to the syrup and keep stirring until all the flour is incorporated into the syrup and a soft dough is formed. Add the coconut pieces and the cardamom, and mix well. Let it cool. Grease your palms and gently knead the dough to avoid any lumps.

Step3:
Divide the dough into 4 or five balls. Heat a flat griddle. Grease your palm and flatten each ball into a circle. (The circle need not be very big. It should at least be half centimeter thick). Place it in the hot griddle and cook by turning over every two minutes. You can also add a teaspoon of ghee or oil to the side of the adai so that it wouldn't look dry.


Serve it hot. 

Sunday, May 6, 2012

Methi Paratha

Methi paratha is a very common tiffin variety in North India, prepared either as stuffed paratha or by mixing methi with the chappati flour. However I've been preparing methi dishes only for the past couple of years, but have only had ready made Methi parathas from the Indian grocery store. I liked the way they were prepared by mixing methi and flour together unlike the stuffed paratha. So I tried this recipe once and found it to be a very simple and easy process. Surprisingly my kiddo didn't differentiate it from the regular chappati and she also liked the taste. That's one big success for me...Check out this easy and healthy recipe that can be substituted for your regular chappati or paratha.

Things you'll need:
Fresh or dried fenugreek (methi) leaves - 2 cups
Chappati flour - 3 cups
Garlic - 2 gloves, finely minced
Cumin seeds - 1 tsp
Chilli powder - 1 tsp
Cumin powder - 1 tsp
Salt - as required
Oil - 2 tsp
Water - for kneading the dough

Yield - 6 parathas

Method:

Step1:
Wash the methi leaves and soak them in lightly salted water with a pinch of turmeric for few minutes. This is to remove all the bitterness in the methi leaves. Squeeze the leaves and chop them.

Step2:
Heat 2 tsp oil in a pan, add the cumin seeds. When the cumin seeds crackle add the minced garlic and the methi leaves. Saute them for couple of minutes, add the chilli powder cumin powder and little salt. Saute until the methi leaves are cooked. Switch off the stove and let it cool.

Step3:
Mix the chappati flour with 1 tsp of salt in a bowl, add the methi leaves and knead it to a soft dough adding water little by little. Keep it aside for half an hour. (Leaving them for some time makes the parathas even softer)

Step4:
Divide them into 6 equally sized balls. Roll them one by one and cook them in medium heat. Spread butter on both sides.


Serve them hot with your choice of side.

Wednesday, June 8, 2011

Raw banana cutlet

This is a recipe I tried from the website spiceindiaonline.com. I got bored of the usual raw banana fry and podimas. So I wanted to try a different recipe. The raw banana cutlet was very simple and tempting. At the very first time it came flawless and appreciated by my husband.
The ingredients are simple and takes less time to prepare

Things you'll need :
Raw banana - 1
Onion - 1 finely chopped
Ginger - 1 " piece minced
garlic - 1 or 2 pods minced
curry leaves - 3 or 4
coriander leaves - 2 sprigs
spinach leaves - handful
green chillis - 2 finely chopped
salt - to taste
turmeric powder - 1 tsp
chilli powder - 1 tsp (optional)
Oil - for deep frying or shallow frying

Yield - 15 cutlets


Method:
Step 1 :
Peel and chop the raw banana and cook them in little water with turmeric powder and little salt. Let it cool and mash it without lumps.

Step 2 :
Add the rest of the ingredients with the mashed banana and mix well. Check for salt.

Step 3 :
Shape them into cutlets  and either shallow or deep fry the cutlets according to preference.

Serve them with ketchup or chutney of your choice. 


Saturday, April 9, 2011

Soya burger

After discovering and succeeding with the soya kheema gravy, I cant think about different recipes using the soya chunks (I can't do just the kheema gravy with a whole pack of soya!!)..soya kurma, soya manchurian,soya nuggets..but these all sounded very common. why not burger?? I cudnt wait to try it once the idea stepped into my mind. But I doubted whether my husband would like the idea, because he is not a very huge fan of soya chunks. So when my husband went out of station, I couldn't wait to try it out. There were actually a couple of recipes for soya burger, so I am not the first one to try..but this one's my own version of the burger

Things you'll need:
soya chunks - 10-12
onion- 1 (medium size)
chilli powder - 1 tsp
green chillies - 2 no. or according to taste
garam masala - 1/2 tsp
salt - to taste
coriander leaves - 5 or 6 stalks finely chopped
black pepper powder - 1 tsp
turmeric powder - 1 pinch
bread crumbs - 1/2 cup
Hamburger buns - 2

Yield - 2 burgers

Method:
Step1:
Boil 4 cups of water, add the soya chunks and leave them in the boiling water for few minutes. Drain the chunks and rinse them several times squeezing the water each time, until the raw smell form the chunks are gone.

Step2:
Coarsely grind the chunks with the chilli powder, garam masala, turmeric powder, salt and black pepper powder. Mix the onions, green chillies, coriander leaves and bread crumbs with the ground mixture.

Step3:
Divide the mixture into two parts and shape each part  into a burger. Drizzle little oil in a pan and shallow fry the burgers until they are evenly browned on both sides.

Step4:
Place them between the burger buns, spread some mayonnaise or your favorite sauce, top it with some tomatio slices and lettuce. Take a bite!!

Note: The bread crumbs can be added or reduced according to the texture of the burgers. It should not be too dry or too sticky.

Sunday, March 13, 2011

spinach cheese swirls my style!

I found this recipe at the back of the puff pastry wrapper. The look of this snack was so appealing. So I went on checking the ingredients. Here's the list of the ingredients:

1/2 of a 17.3-ounce package Pepperidge Farm® Puff Pastry Sheets (1 sheet), thawed
1 egg
1 tablespoon water
1/2 cup shredded Muenster cheese OR Monterey Jack cheese
1/4 cup grated Parmesan cheese
1 green onion, chopped (about 2 tablespoons)
1/8 teaspoon garlic powder
1 package (about 10 ounces) frozen chopped spinach, thawed and well drained


Now I wanted to make some changes in the recipe..why? to become innovative? to create my own recipe and send it to food network? no...simple..I didn't have all of those listed ingredients lol..

I interchanged the following ingredients with things I found in my pantry:
Grated parmesan cheese --> Shredded mozzarella cheese
Chopped green onions --> chopped green onions and red onions
Garlic powder --> Minced garlic
Frozen spinach --> Bunch of fresh spinach leaves, chopped

The original recipe does not need any cooking prior to baking, but since I was using some fresh ingredients I had to do light the stove for few minutes.

Serves 4-5 people (yields approx. 20 wheels)

Method:
Step1:
Preheat the oven to 400 degrees. Heat 1 tsp oil in a pan and saute the onions, garlic and the spinach. Saute until the spinach is relieved of all its moisture. Allow it to cool.

Step2:
Unfold the pastry sheet in lightly floured surface (try unfolding the sheet while its half thawed, since the sheet becomes more sticky and difficult to unfold when fully thawed). Slightly roll the sheet to make it even. Spread the spinach mixture, and sprinkle the cheeses.

Step3:
Carefully roll the pastry sheet like a mat from the longer side of the sheet. Brush the edge of the pastry sheet with egg wash (prepared by mixing the egg and water) to firmly seal the sheet. Now cut the roll into 1/2 inch slices. There will be approx. 20 pieces.


(The spinach cheese swirls are kind of messed up bcoz the pastry sheet thawed completely and became sticky..so cutting the sheet was a challenge. Spreading the spinach mixture and cutting the sheet, before its completely thawed would help in cutting them in perfect shape.)

Step4:
Place the swirls in a baking sheet, brush them with the remaining egg wash,  and bake them in the oven for 15-20 mins.
Serve them hot plainly or with ketchup.


Note: Egg wash is optional. It makes the crust more brown and crunchier. Alternately to seal the edges of the pastry sheet paste of flour and water can be used.

Wednesday, February 16, 2011

Maggi bonda

My husband was bragging about this snack he used to get in the IIT canteen when he was doing his masters in Mumbai. I became curious and decided to try it out sometime ..hmm..my husband should be very lucky to have a wife like me who cooks whatever he desires or even imagines..that's quite a self-appreciation there..OK here's the story how i did the Maggi bonda finally..
On a summer weekend surprisingly we both woke up early (maybe because my daughter would have got up and must have been jumping in the bed..nothing other than that could have kicked us out of bed so early..)
Since we had a lot of time I decided to prepare a neat breakfast to kick start the day. My husband would have read my mind. With a lot of expectations in his eyes, he proposed the Maggi bonda idea (he was proposing the idea for a long time, but I somehow felt it will take a lot of time and was disposing it).
There was still time to prepare an alternate breakfast if the Maggi bonda turns out to be a disaster, so with an agreement that he had to feed breakfast to my daughter,  I began searching for the recipe in the web, but couldn't find a recipe for Maggi bonda. So with my husband's help I came up with my own version of the recipe.

Things you'll need:
Maggi noodles - 1 pack (the spicy flavors would be perfect)
besan flour - 3/4 cup
salt - as needed
chilli powder - 1/2 tsp
coriander leaves - 2 sprigs finely chopped
Oil - for deep frying

Serves 2-3 people

Method:

Step1:
Cook the Maggi noodles as per instructions and let it cool. You can reduce 1/4 cup of water from the required amount to make the noodles dry. It shouldn't be soupy or else the noodles would be difficult to shape them into balls,.

Step 2:
Prepare the bonda batter by mixing the besan flour with salt, chilli powder and coriander leaves. Then add water little by little until a thick batter is formed and no lumps are found.

Step 3:
Press the Maggi noodles into lemon sized balls and dip the balls into the besan batter and deep fry in medium hot oil. Since the noodles are already cooked, the bondas need not be in the oil for long. Strain them and serve with ketchup or mint chutney as evening snack or appetizer. (its strange that we had this for breakfast..)
tip: Since the noodles has its own seasoning, the bonda can be seasoned in your own way using your imagination.