Friday, July 20, 2012

Vegetable and cheese crepe

For this recipe the credit goes completely to my husband, because he was the one who attempted to try this one, and he makes this each time we feel like having the crepe :). We use Bisquick pancake mix for this recipe but it can also be done with all purpose flour with some baking powder and baking soda. Treat yourself with restaurant style crepe when you are not in a mood for regular food.

Things you'll need:
Bisquick pancake mix/ all purpose flour - 1 cup
Egg - 1 (alternatively you can use 1/3 cup of egg white)
Milk or water - just enough to prepare the batter
Shredded cheddar cheese - 1/4 cup
Onion - 1, small, chopped
Sun-dried tomatoes (optional) - 2 ,chopped
Mixed vegetables (carrot, beans, broccoli, mushroom, peas, bell pepper) - 1 cup
Salt - as per taste
Butter - as required

Yield - 2 Crepes

Method:

Step1:
Prepare the batter by mixing the Bisquick mix/ all purpose flour with milk/water. If using all purpose flour add salt, baking powder and baking soda, a pinch of each.

Step2:
Stir fry the onions, tomatoes (optional) and mixed vegetables with salt and pepper until the vegetables are cooked. Beat the egg with little salt and pepper.


Step3:
Pour a ladle full of batter on a flat pan or tava greased with some butter, in medium flame. Spread the batter into a crepe. When the upper side of the crepe is dry, pour some egg mixture and spread. When the egg is cooked, spread some of the vegetables and shredded cheese. Fold the crepe and serve hot with fries or chips.


Sunday, June 24, 2012

Simple aval (poha) upma

Whenever we have a late and heavy lunch, or if we go somewhere in the weekend and come back late in the evening, we prefer simple and light dinner. Poha upma would be our choice most of the times. I do it with just onions and green chillies or additionally with some veggies if I have the time and the veggies. This make-in minutes meal could also be prepared as evening snacks for kids with veggies and coarsely powdered nuts.

Things you'll need:
Aval (poha) - 1 cup
Onion - 1, finely chopped
Green chillies - 2, finely chopped
Curry leaves - hand full
Vegetables (carrot, peas, potato) - 1/2 cup (If using potato, cook and cube it before adding to upma)
Salt - to taste
Coriander leaves - few sprigs, for garnishing
Cashew nut/peanut powder  (optional) - 2 tsp

For tempering :
Oil - 1 tbsp
Mustard seeds - 1 tsp
Urad dal - 1tsp
Cashew nuts - few, broken
Turmeric powder - 1 tsp

Yield - 2 Servings

Method:

Step1:
Soak the aval (poha) in 3 cups of warm water for half an hour or until it turns soft. Drain and keep aside.

Step2:
Heat oil in a pa and add the tempering ingredients. When the mustard seeds starts bursting, add the onions green chillies and curry leaves. Fry till the onions turn translucent. Add the vegetables and salt, cook them in a slow flame until the veggies are almost cooked.

Step3:
Add poha and fry until the moisture in the poha is absorbed and the mixture is dry. Switch off the stove. Garnish with coriander leaves and nut powder (optional)


Serve with your favorite pickle or chutney (We have it with sweet and spicy mango pickle ) 

Friday, June 15, 2012

Sura puttu..(Spicy shark hash)

This recipe was one of my favorite seafood recipes since I remember. I still remember my dad getting the whole shark from the fish market, my mom cleaning and cutting the shark, and of course preparing the sura puttu. As a child I didn't really appreciate the effort that's behind this wonderful recipe. I only enjoyed the end product. Only after I started cooking, did I realize the dedication and effort behind each food we prepare and the satisfaction we get when the dish comes so well and gets praised by others. Luckily for me, after coming to US, cooking is not always done from scratch, because from meat to vegetables we get most of them them pre-cut or frozen. We sometime get shark fillets in our nearby grocery store. It doesn't taste as good as fresh shark but something is better than nothing. So we doesn't miss a chance when we see fresh (partially) shark fillets in the store. Sura puttu is always sura puttu, fresh or not.
Now to the recipe..

Things you'll need:
Shark - 1 lb
Onion - 2, medium, chopped
Garlic - 10-15 cloves, minced (or more if you like the garlic flavor)
Green chillies - 5, minced
Curry leaves - a handful
Coriander leaves - for garnishing
Salt - to taste
Turmeric powder - 1 tsp
Oil - 2 tbsp


Yield - 3-4 Servings

Method:

Step1:
Clean and cut the shark into medium size pieces. In a pan, bring two cups of water to boil. Add the shark pieces with the turmeric powder and cook covered for five mins or couple of mins more. That's enough for the shark to become soft. (If it stays rubbery even after 10 mins, there's no point in using them for sura puttu ). Let it cool.

Step2:
Remove the skin from the shark pieces, if any, and gently shred the shark pieces with your hands. If you find bones in the shark, don't throw them away. It will enhance the flavor of the sura puttu.

Step3:
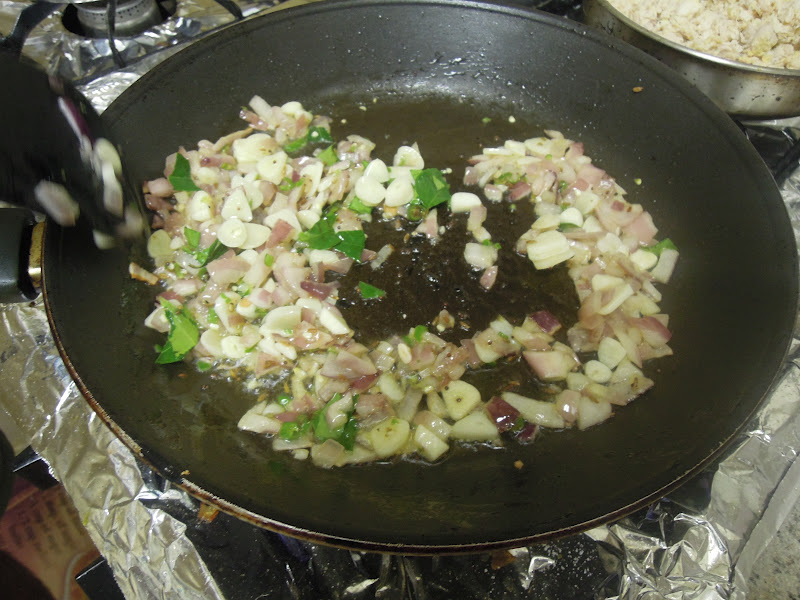
In a deep frying pan, heat the oil, add the onions and fry until golden brown. Add the green chillies, garlic and  curry leaves. Add a small pinch of turmeric powder. Now add the shark pieces and salt.
Mix well and cook for few minutes until the sura puttu is dry.


Serve with rice and your choice of curry or rasam.


Thursday, June 14, 2012

Ragi Adai (sweet version)

Ragi is one of the nutritious grains that we add to our diet in various forms including porridge, idli, dosa,idyappam etc., It can also be had as 'adai' either in sweet or spicy version. I prefer the sweet version because however nutritious ragi might be, I need something to convince me to eat ragi as a main dish. This is very easy to make and would be a quick fix dinner or evening snack. Kids who love sweet (that excludes my daughter) will definitely love this ragi adai.

Things you'll need:

Ragi flour - 1 cup
Jaggery (crushed) - 1/2 cup
Water - 1 cup
Coconut (thinly sliced and chopped) - 1/4 cup
Cardamom - 1 pod, crushed
Ghee - 2 tsp

Yield - 4 or 5 pieces

Method:

Step 1:
Heat the ghee in a pan and toast the coconut pieces until light brown in color. Keep aside. Bring the water to boil and add jaggery. When the jaggery is completely melted, strain the syrup if there are any impurities, and heat the syrup until it comes to a boil. Switch off the stove.

Step2:
 Add the ragi flour slowly to the syrup and keep stirring until all the flour is incorporated into the syrup and a soft dough is formed. Add the coconut pieces and the cardamom, and mix well. Let it cool. Grease your palms and gently knead the dough to avoid any lumps.

Step3:
Divide the dough into 4 or five balls. Heat a flat griddle. Grease your palm and flatten each ball into a circle. (The circle need not be very big. It should at least be half centimeter thick). Place it in the hot griddle and cook by turning over every two minutes. You can also add a teaspoon of ghee or oil to the side of the adai so that it wouldn't look dry.


Serve it hot. 

Monday, June 11, 2012

My new crochet project..Baby set

Finally I have finished the baby set for my friend's newborn girl!!!!. I have made a blanket, sweater and a hat for the sweetie. The blanket took me a very long time but the sweater and hat took me only a week to complete.

I should manage to send her the baby set this week. This is going to be a complete surprise for her. I wish she likes them.


I used babysport yarn for this blanket and the pattern is from lionbrand.com. You just have to register and you can view lots and lots of free patterns. This website was very useful for me to try out new crochet projects. 

This sweater is a combination of two patterns. The top half of the sweater is made using the sweater pattern from yarnydays.com. The link for this pattern is http://www.yarnydays.com/2009/02/everyday-is-new-sweater-day.html
The umbrella pattern of the lower half of this sweater and the sleeves are made using the pattern
http://www.youtube.com/watch?v=H4EdtsIzcUY


I was thinking to make a regular beanie but suddenly struck by the idea of ear flap hat. For girls, I think, some extra decorations make them look more cute and pretty. So this ear flap hat would be a perfect choice for baby girls. I got this pattern from http://allicrafts.blogspot.com/search/label/9-12%20months


The sweater and hat are for 9-12 months size. But they looked a bit smaller for me. That might be even because its been a long time since I've been with babies less than a year. Hoping to crochet more sweaters and hats if this one fits her and my friend likes this set.

PS: I've added some links for patterns that I could remember, as I have promised.

My next project is a boy's sweater for my hubby's friend who just had a baby boy. Will try to finish the sweater ASAP and upload it sooner.

Friday, May 11, 2012

Eggplant tomato chutney (Kathirikkai thakkali thokku)

I am one of those people who love all the vegetables but give the cold shoulder for eggplant/brinjal. I can only tolerate it in 'puli kuzhambu' or 'ennai kathirikkai' both giving a tangy and spicy taste to the eggplant. If it is in sambar or stir fried, I would rather stay hungry (not quite true!!). After marriage I didn't have much choice to avoid eggplant since my husband was not in my 'eggplant haters' club. So I ended up doing 'ennai kathirikai' each time he gets the grocery. I couldn't imagine any other dish with eggplant until my mother-in-law made this eggplant tomato chutney. It is really delicious, simple, easy, and you really don't feel like eating the eggplant bcoz they are cut into bite size pieces and are almost mashed when the chutney is ready. Now I have one more dish to do with eggplant (my husband would be more than happy that there's an alternative to ennai kathirikai so he doesn't have to eat it every other week)..OK, without further boredom, here comes the recipe for the chutney.

Things you'll need:

Eggplant/Brinjal - 2, medium, sized, cut into bite-sized cubes
Onion - 1, small, chopped
Tomato - 1, medium, chopped
Chilli powder - 2 tsp
Turmeric powder - 1/4 tsp
Salt - as required
Peanuts and sesame seeds - 1tbsp each, roasted and coarsely ground
Curry leaves - 2 or 3, coarsely chopped
Mustard seeds - 1 tsp
Oil - for tempering

Yield - Serves 2-3 persons

Method:

Step 1:
Heat oil in a pan and add mustard seeds. When the mustard seeds splutter, add chopped onions and curry leaves. Saute until the onions turn translucent.

Step 2:
Add the tomatoes and saute until the tomatoes turn soft. Mash them gently. Add the eggplant cubes (The eggplant should either be chopped before adding to the pan or chopped beforehand and soaked in water to avoid discoloration). Saute for a couple of minutes and add turmeric and chilli powders and salt. Add small amount of water just to avoid the vegetables sticking to the bottom of the pan, mix well. Reduce the heat, cover and cook until the eggplants are cooked well and oil separates at the top.


Step 3:
Add the peanut-sesame seed powder, stir well and switch off the stove. Serve it with dosas, idlis or even your favorite parathas.


Sending this recipe to Vardhini's Dish it out event hosted by Pavani's Cook's hideout

Thursday, May 10, 2012

A new addiction...Crochet

Knitting and sewing was in my hobby list from ever since I could remember. But for some reason I didn't pursue it very seriously. Only recently I battled all my blocks and finally got into it. But before trying knitting I wanted to practice crochet (I believed crochet was much easier than knitting). I found my motivation through a friend who was into knitting for a very long time and has decorated her home with her beautiful creations. I came to know knitting is not only for baby sweaters and hats, but has lots of uses once your imagination is untied. I searched for basic crochet patterns in the net and learned crochet through lots of YouTube videos and couldn't stop myself from crocheting from then. I'll make sure to add all the links when I find time.

I first started with a hat for my daughter. I was a bit overconfident and did a slight mistake. I thought that the hat wouldn't fit my toddler's head and did an extra step which resulted in a large hat. It fit my toddler's head but it was not a perfect fit I should say. It was a bit loose for her. So I decided to keep that for myself. I was feeling guilty and tried to make it up for her by crocheting another hat. I followed the exact gauge and stitches. But this time the hat looked smaller. It might be because of the yarn or the needle. I promised to myself that next time I am going to follow the rules very strictly.

My next project was once again a hat for my little one. By this time the weather was getting better, so I decided to make a fancy summer hat. With a YouTube video to help I finished the hat and it perfectly fit my little one's head. Phew!! what a relief.

This time I wanted to make a small purse with a long string to take my phone and house keys while I went to the park with my daughter. I wanted a very simple and easy pattern, but the handbag patterns I saw were very complicated and seems like it would take a long time to complete. So I crocheted the bag with my own ideas. I also made a button with the leftover yarn, viewing a YouTube video. My daughter loved it and wanted to take her water bottle in the bag, to the park...Hmm Mothers are made to sacrifice..'No problem I can make a handbag for myself sometime later' I told myself.


My husband was very cross with me ..("You are making hats and bags for you and your daughter, what about me?"). OK. Here you go Darling Hubby...A smart crew cap for you. I found this pattern in a YouTube video. It didn't come as exactly as shown but it is still good and he wore it very proudly on our wedding anniversary.

link for the pattern: http://www.youtube.com/watch?v=gEffgaeEbus


There's some leftover yarn after the bag. I searched for a pattern to finish off the yarn. A shrug pattern got my eye at lionbrand.com. They have a huge collection of crochet and knitting patterns. And they also have an option to buy the necessary yarn and other accessories from their online store.
This sequoia shrug (I'm not sure if I spelled it right..) took quite a long time for me to finish plus I had to buy extra yarn. But it's worth the effort. I was very pleased by the result.

Link for the pattern: http://www.youtube.com/watch?v=2nB94a0bAZg


These are the small bow clips I made for my daughter
http://www.youtube.com/watch?v=Hcxz3r9VZoQ

My next project is a baby blanket and sweater for my friend's newborn girl. I hope I finish it before the baby starts walking..lol will upload the photos once I finished this projects..

PS: In the middle of the blanket I finished a wallet (cant wait until I finish the blanket and sweater..). This wallet is an improvisation of a basic credit card purse pattern by bobwilson which I saw in You Tube. I have added an additional card space so that you have three spaces for keeping your money , card and even your phone.
The basic pattern can be viewed at http://www.youtube.com/watch?v=YFbqXRp84NI