Showing posts with label spicy. Show all posts

Thursday, August 15, 2013

Quick and easy aloo mattar (Potato peas curry)

With a very picky eater at hand I always try to sneak up vegetables whenever I can either by mashing them or making them in a more appealing way (fritters, bajji
etc.,). This is one such dish in which the vegetables are well cooked and easy to mash and the gravy is convincing and appealing to the spice-seeking taste buds. This is one of my favorite ad trusted take-away food when we go out for a picnic or visit a zoo or park. And you can make it in minutes even in the busy mornings.

Things you'll need:
Onion - 1, finely chopped
Ginger garlic paste - 1 tsp
Tomato paste or puree - 1 tbsp.
Potato - 1, diced
Peas - frozen or fresh, 1/2 cup
Cumin seeds - 1/2 tsp
Chilli powder - 1 tsp
Coriander powder - 2 tsp
Turmeric powder -  a pinch
Dry mango powder - 1/2 tsp
Garam masala powder - 1/4 tsp
Salt - to taste
Oil - 2 tbsp

Yield - Serves 2 persons

Method:

Step 1:

Heat the oil in a pressure cooker or a pan, and add cumin seeds. When they start to crackle, add the onions and fry them until translucent. Add the ginger garlic paste, sauté for a while and add the tomato paste. Mix well.

Step 2:
Add the potato and peas sauté for a couple of mins and add the masala powders and salt. Mix well until combined. Add 1/2 to 3/4 cup of water according to desired thickness and close the pan. Cook for two whistles if using a pressure cooker or cook for ten mins in medium flame with lid closed if using a pan.

Step 3:
Garnish with chopped coriander leaves if desired and serve with roti, chapatti,  or poori.

Note:
if dry mango powder is not available use 1tbsp of lemon juice instead.

Monday, June 10, 2013

Vazhaipoo vadai

In my childhood days I've heard in songs and read in books that the banana tree is a great example for sacrifice as every part of it is consumed by humans. I would sometimes wonder if it is the tree's sacrificial nature to give out everything or the humans' selfish nature to get as much as we can. Philosophies apart, since the banana tree has a use in every bit of it, every house which has a garden space would have a banana tree. Even if it doesn't yield fruits, we can always use its leaves for serving or packing food, or use the trunk and flower in cooking. I remember  growing a banana tree in our house and waiting for it to yield fruits which seemed like a lifetime. I also remember the size of the fruits were nowhere near to the size of the smallest variety of banana. But the taste of something grown in our own garden is definitely better than the best of what we get in stores. Now...why I am I telling this story? just to explain the fact that the banana flower is edible. It is made as a dry curry as such (poriyal) or with dal (paruppu usili),  or as fritters (vadai). My mom once made this vadai and ever since I am a big fan of this vazhaipoo vadai (but I always wonder why it was purple). The toughest part in this recipe is cleaning the flower. Once you have done cleaning you can make the fritters in no time. You could also clean up the flowers ahead of time, but the flowers starts to darken if not cooked immediately. But they are still edible and doesn't affect the taste or texture of the vadai. The center portion of the flower is also edible and can be eaten raw or cooked,

Things you'll need:
Banana flower (Vazhaipoo) - 1
Channa dal - 1 cup, soaked for 2 hours
Onion - 1, big, Finely chopped
Garlic - 3 pods, minced
Curry leaves - 3 or 4, chopped
Fennel seeds - 1 tsp
Green chillies - 2, minced
Chilli powder - 1 tsp
Turmeric powder - 1/4 tsp
Salt - as required
Coriander leaves - 3 or 4 springs, finely chopped
Oil - for deep frying

Yield - 15 - 20 pieces

Method:

Step 1:
Remove each petal of the flower and collect the small flowers inside. Remove the thin membrane and thick stamen in each small flower. When you have removed as many of the flowers (you could leave the smallest flowers toward the end), chop the flowers and soak them in water with a little turmeric powder until you get the vadai mixture ready.

Step 2:
Coarsely  grind the channa dal, add the rest of the ingredients  and mix well. Squeeze the water out of the banana flowers and add them to the vadai mixture and mix well.

Step 3:
Make small balls of the vadai mixture and flatten them to discs. Deep fry them in medium heat and serve hot with sauce or chutney.


Sending it to Vardhini's Dish it out event


Friday, September 28, 2012

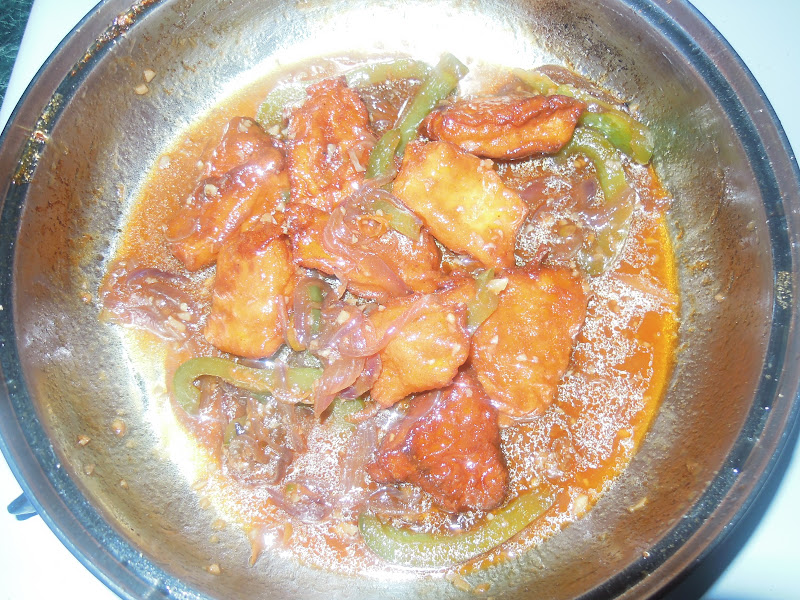
Chilli fish (gravy)

Indo-chinese recipes are my all time favorite. Whenever I want to take time off from my regular dishes and do something special for dinner or lunch I opt for Indo-chinese food without blinking an eye. Usually it will be a Manchurian and fried rice. But this time I wanted to do a seafood special. Chilli fish is the first thing came to my mind. We usually go for chilli fish with fried rice/noodles when we do a take-away. Somehow I thought it takes a lot of time to prepare it and hence never attempted to give it a try. Yes, it took a bit of my time but it wasn't so complicated as I thought. I made it for a Saturday dinner and served with veggie stir fry noodles.

Things you'll need:
Fish fillets - 2 (tilapia or any firm fish)
Soy sauce - 2tbsp + 2tsp
Chilli sauce - 1tbsp+1tsp
Corn flour -  2 tbsp
Salt - as needed
Food color (orange or red) - a pinch (optional)
Garlic cloves - 3, finely chopped
Onion - 1, cubed or slit lengthwise
Bell pepper (green or mixed colors) - 1 cup, cubed or slit lengthwise
Tomato paste - 1 tsp
Green onions - 2, finely chopped


Oil - for deep frying the fish and sauteing the vegetables

Yield - 2 Servings

Method:

Step1:
Cut the fillets into small pieces. Mix the cornflour, 2 tsp of soy sauce, 1 tsp of chilli sauce, salt and food color (optional) in a bowl.

Step2:
Coat the fish pieces with the corn flour mixture and deep fry them in small batches. Let them sit on a paper towel.

Step3:
Heat a little oil in a pan, saute the onion, garlic and bell pepper, uncovered in medium low, until the vegetables are cooked but little crunchy. Add the tomato paste, 2 tbsp of soy sauce, 1 tbsp of chilli sauce and salt. Bring to a boil.


Step5:
Reduce the heat to low and cook the sauce for a couple of minutes. Add the fillets, mix it well, switch off the stove and garnish with green onions.


Serve it with fried rice or noodles

Tips:
Use dark sesame oil for more authentic effect. You could also use some toasted sesame seeds for garnishing.
If you prefer a thicker gravy, mix 2 tsp of cornflour in  1/4 cup of  water and stir into the boiling gravy. The gravy will thicken in couple of minutes. 

Friday, June 15, 2012

Sura puttu..(Spicy shark hash)

This recipe was one of my favorite seafood recipes since I remember. I still remember my dad getting the whole shark from the fish market, my mom cleaning and cutting the shark, and of course preparing the sura puttu. As a child I didn't really appreciate the effort that's behind this wonderful recipe. I only enjoyed the end product. Only after I started cooking, did I realize the dedication and effort behind each food we prepare and the satisfaction we get when the dish comes so well and gets praised by others. Luckily for me, after coming to US, cooking is not always done from scratch, because from meat to vegetables we get most of them them pre-cut or frozen. We sometime get shark fillets in our nearby grocery store. It doesn't taste as good as fresh shark but something is better than nothing. So we doesn't miss a chance when we see fresh (partially) shark fillets in the store. Sura puttu is always sura puttu, fresh or not.
Now to the recipe..

Things you'll need:
Shark - 1 lb
Onion - 2, medium, chopped
Garlic - 10-15 cloves, minced (or more if you like the garlic flavor)
Green chillies - 5, minced
Curry leaves - a handful
Coriander leaves - for garnishing
Salt - to taste
Turmeric powder - 1 tsp
Oil - 2 tbsp


Yield - 3-4 Servings

Method:

Step1:
Clean and cut the shark into medium size pieces. In a pan, bring two cups of water to boil. Add the shark pieces with the turmeric powder and cook covered for five mins or couple of mins more. That's enough for the shark to become soft. (If it stays rubbery even after 10 mins, there's no point in using them for sura puttu ). Let it cool.

Step2:
Remove the skin from the shark pieces, if any, and gently shred the shark pieces with your hands. If you find bones in the shark, don't throw them away. It will enhance the flavor of the sura puttu.

Step3:
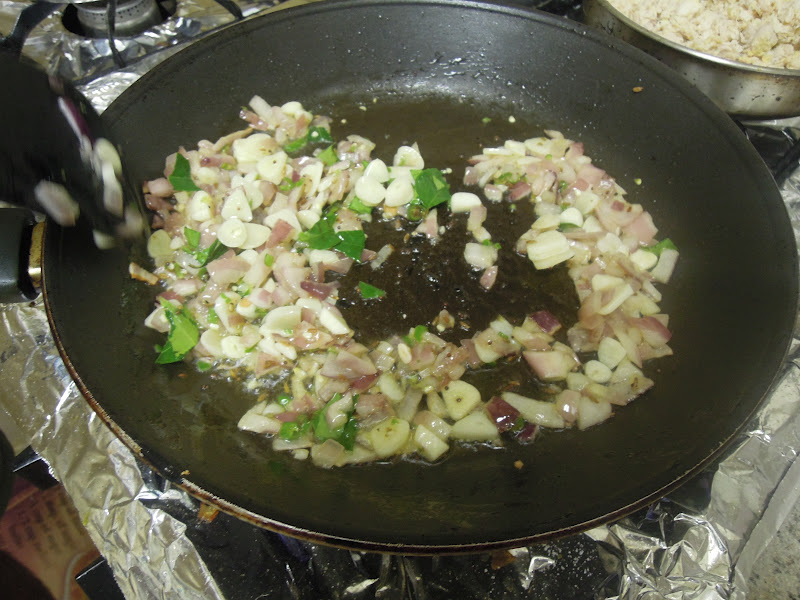
In a deep frying pan, heat the oil, add the onions and fry until golden brown. Add the green chillies, garlic and  curry leaves. Add a small pinch of turmeric powder. Now add the shark pieces and salt.
Mix well and cook for few minutes until the sura puttu is dry.


Serve with rice and your choice of curry or rasam.


Friday, May 11, 2012

Eggplant tomato chutney (Kathirikkai thakkali thokku)

I am one of those people who love all the vegetables but give the cold shoulder for eggplant/brinjal. I can only tolerate it in 'puli kuzhambu' or 'ennai kathirikkai' both giving a tangy and spicy taste to the eggplant. If it is in sambar or stir fried, I would rather stay hungry (not quite true!!). After marriage I didn't have much choice to avoid eggplant since my husband was not in my 'eggplant haters' club. So I ended up doing 'ennai kathirikai' each time he gets the grocery. I couldn't imagine any other dish with eggplant until my mother-in-law made this eggplant tomato chutney. It is really delicious, simple, easy, and you really don't feel like eating the eggplant bcoz they are cut into bite size pieces and are almost mashed when the chutney is ready. Now I have one more dish to do with eggplant (my husband would be more than happy that there's an alternative to ennai kathirikai so he doesn't have to eat it every other week)..OK, without further boredom, here comes the recipe for the chutney.

Things you'll need:

Eggplant/Brinjal - 2, medium, sized, cut into bite-sized cubes
Onion - 1, small, chopped
Tomato - 1, medium, chopped
Chilli powder - 2 tsp
Turmeric powder - 1/4 tsp
Salt - as required
Peanuts and sesame seeds - 1tbsp each, roasted and coarsely ground
Curry leaves - 2 or 3, coarsely chopped
Mustard seeds - 1 tsp
Oil - for tempering

Yield - Serves 2-3 persons

Method:

Step 1:
Heat oil in a pan and add mustard seeds. When the mustard seeds splutter, add chopped onions and curry leaves. Saute until the onions turn translucent.

Step 2:
Add the tomatoes and saute until the tomatoes turn soft. Mash them gently. Add the eggplant cubes (The eggplant should either be chopped before adding to the pan or chopped beforehand and soaked in water to avoid discoloration). Saute for a couple of minutes and add turmeric and chilli powders and salt. Add small amount of water just to avoid the vegetables sticking to the bottom of the pan, mix well. Reduce the heat, cover and cook until the eggplants are cooked well and oil separates at the top.


Step 3:
Add the peanut-sesame seed powder, stir well and switch off the stove. Serve it with dosas, idlis or even your favorite parathas.


Sending this recipe to Vardhini's Dish it out event hosted by Pavani's Cook's hideout

Sunday, May 6, 2012

Methi Paratha

Methi paratha is a very common tiffin variety in North India, prepared either as stuffed paratha or by mixing methi with the chappati flour. However I've been preparing methi dishes only for the past couple of years, but have only had ready made Methi parathas from the Indian grocery store. I liked the way they were prepared by mixing methi and flour together unlike the stuffed paratha. So I tried this recipe once and found it to be a very simple and easy process. Surprisingly my kiddo didn't differentiate it from the regular chappati and she also liked the taste. That's one big success for me...Check out this easy and healthy recipe that can be substituted for your regular chappati or paratha.

Things you'll need:
Fresh or dried fenugreek (methi) leaves - 2 cups
Chappati flour - 3 cups
Garlic - 2 gloves, finely minced
Cumin seeds - 1 tsp
Chilli powder - 1 tsp
Cumin powder - 1 tsp
Salt - as required
Oil - 2 tsp
Water - for kneading the dough

Yield - 6 parathas

Method:

Step1:
Wash the methi leaves and soak them in lightly salted water with a pinch of turmeric for few minutes. This is to remove all the bitterness in the methi leaves. Squeeze the leaves and chop them.

Step2:
Heat 2 tsp oil in a pan, add the cumin seeds. When the cumin seeds crackle add the minced garlic and the methi leaves. Saute them for couple of minutes, add the chilli powder cumin powder and little salt. Saute until the methi leaves are cooked. Switch off the stove and let it cool.

Step3:
Mix the chappati flour with 1 tsp of salt in a bowl, add the methi leaves and knead it to a soft dough adding water little by little. Keep it aside for half an hour. (Leaving them for some time makes the parathas even softer)

Step4:
Divide them into 6 equally sized balls. Roll them one by one and cook them in medium heat. Spread butter on both sides.


Serve them hot with your choice of side.

Saturday, May 5, 2012

Cheesy mac and broc!! (Spicy macaroni and cheese with Broccoli)

Nowadays I have got into the practice of innovating lunch box ideas just to make something convincing for my preschool so that she would eat her lunch at school. My little one is not a great fan of mac and cheese and would back off even if I say the name. I tried the mac and cheese recipe with white cheddar cheese instead of the orange cheese (which I have already posted in this blog) and named it as white pasta (Yeah!! I have to invent new names too). She liked it and ate it only the first day and it came back untouched for the next couple of times.. So I made a spicy version of the mac and cheese with broccoli (That's one of the few vegetables she likes) and packed it with a garlic bread and prayed that she should like it. With all that hype...Here's the recipe for the spicy mac and cheese..

Things you'll need:
Macaroni - 1/2 cup
Onion - 1 small, chopped
Garlic - 2 gloves, minced
Italian seasoning - 1 tsp (optional)
Chilli powder - 1 tsp
Salt - as required
Ground black pepper - 1/4 tsp
Fresh or frozen broccoli florets - 1/2 cup
Evaporated milk - 1/2 cup
All purpose flour - 1 tbsp
Shredded cheddar cheese - 1/4 cup
Butter - 2 tbsp

Yield - 2 Servings

Method :

Step1:
Bring 3 cups of water in a pan and bring it to a boil. Add 1/2 tsp of salt and the macaroni, and let it cook for 10 mins until the pasta is cooked (should be firm and not too soft). Drain and keep aside. Cook the broccoli with some salt and pepper (I cooked it well enough to mash it. You could just blanch the florets and add them to the pasta)

Step2:
Heat the butter in a pan and saute the onion and garlic for couple of minutes. Add the Italian seasoning, chilli powder, salt and pepper and saute them for a while. Add the flour and stir until the flour is incorporated into the mixture. Its ok if the mixture turns dry after adding the flour.

Step3:
Add the evaporated milk slowly and mix well so that the flour mixture is mixed well with the milk and no lumps are formed. Once the mixture thickens and becomes creamy, switch off the stove and add the cheddar cheese. Stir until the cheese melts.

Step4:
Add the pasta and the broccoli. Mix them all and serve with a toasted garlic bread. If you are packing it for lunch, warm 2 tbsp of milk and pour it over the pasta before closing the lunch box so that the pasta stays wet and creamy.


PS: My kiddo ate the garlic bread and had only a couple of bites of the mac and cheese. I would give it one more try before going for the next experiment.. I liked it with some nachos though.. :)

Wednesday, May 2, 2012

Vegetable manchurian

My friend would be very happy to see this recipe posted. She was asking to post this recipe ever since I made this for our Chinese themed potluck. I tried this recipe for the first time and luckily it came so well and liked by all my friends. This recipe takes quite a bit of time for the prep work. With a little patience and care this recipe would turn perfect.

Things you'll need:

For the vegetable balls:
Mixed vegetables (I used carrot, cabbage, beans and cauliflower) - 2 cups, grated
Salt - as required
Soy sauce - 1 tsp
Corn flour - 1/2  cup
Chilli sauce - 2 tsp
Boiled rice - 1/4 cup (optional, to reduce stickiness of the vegetable mixture and easily hold them)
Spring onions (white and green parts) - 2, finely chopped
Oil - for deep frying the balls

For the gravy:
Onion - 1, finely chopped
Garlic - 2 cloves, minced
Ginger - 1" piece, minced
Soy sauce - 2 tbsp
Chilli sauce - 1 tbsp
Sugar - 2 tsp
Sweet and sour sauce (optional) - 1 tbsp
Corn flour - 1 tbsp
Vinegar - 1tbsp
Vegetable stock (reserved after boiling the vegetables) or water - 1/2 cup
Salt - as required
Spring onions (green part) - 2

NOTE: Take care when adding the salt as soy sauce contains salt.

Yield - Serves 5-6 persons

Method:

Step1:

Blanch the vegetables with little salt in 1/2 cup water for couple of minutes. Squeeze out the water and reserve it for the gravy. Add the soy sauce, chilli sauce, green onions, corn flour and boiled rice (optional), to the vegetables and shape them into balls. Deep fry the balls and keep aside.


Note: Always try frying one ball first, and if comes together fry the other balls.

Step2:

Heat a little oil in a pan, saute the onions, garlic and  ginger. Add the sauces, vinegar, salt and sugar, and the stock. Bring it to a boil. Reduce the heat and simmer for couple of minutes. Mix the corn flour in 1/4 cup of water and add it to the gravy. Stir until the gravy thickens. Switch off the stove and garnish with spring onions.


Step3:

Add the fried balls just before serving. Serve with fried rice or noodles.

TIP: If you want it dry, skip the stock. Rest all the steps are same.


Monday, April 30, 2012

Mint (Pudina) pulao

This is one of my favorite mixed rice varieties. I love this pulao for one more reason..My lil one likes this one after her most favorite 'masala rice' (biriyani). Whenever we get mint from the grocery store, I would make this pulao with any spicy side (rajma masala, channa masala or chicken curry) and there's our exotic lunch served. Excluding the time it takes to remove the mint leaves from the stalks, it takes very less time and could be prepared quickly.

Things you’ll need:
Mint leaves (without stem) – 1 cup
Coriander leaves or Cilantro – a bunch
Green chillies – 2
Onion – 1, cut lengthwise
Ginger garlic paste – 2 tsp
Salt – as required
Lemon juice – 1 tbsp
Coconut milk (optional) – 1 cup
Water – 2 cups (1 cup if using coconut milk)
Whole garam masala (cinnamon, cloves, bay leaves) – as desired
Basmati rice – 1 cup
Oil or ghee – 2 tbsp

Yield – Serves 2-3 people

Method:
Step1:
Clean and soak the rice for 15 minutes. Grind the mint leaves, coriander leaves and green chillies into a paste without adding water.


Step2:
Heat the oil (or ghee) in a pan and add the whole garam masalas. When they crackle, add the onions and saute until they are soft. Add the ginger garlic paste and fry until its raw smell subsides.  Add the green paste and saute for couple of minutes.
Step 3:
Drain and add the rice to the pan, fry until the water is absorbed, add the water (and coconut milk if desired), lemon juice and salt.  Transfer it to a rice cooker or pressure cooker and cook until the rice is done. (you can switch off the cooker in ten minutes if the rice cooker doesn't turn off automatically. For pressure cooker you can switch off after two whistles)

Serve with your choice of curry.


Thursday, April 19, 2012

Ground chicken curry (Chicken kothu kari kuzhambu)

This is a spicy coconut-based curry which is very easy to make, doesn't need any frying like the regular 'kola urundai' kuzhambu, and tastes so yummy. I got the packed ground chicken for this recipe..you can either get the packed one or if you don't have it in hand, you could just grind some boneless breast meat in a mixer/grinder (make sure to wash the jar thoroughly after grinding, because the ground meat sticks to the blades).

Things you'll need:

For the meat balls:
Ground chicken - 1 lb
Onion - 1, medium, finely chopped
Green chillies  - 2 minced
Ginger garlic paste - 2 tsp
Curry leaves - 2 or 3, chopped
Coriander leaves - 2 or 3 sprigs, chopped
Chilli powder - 1 tsp
Turmeric powder - 1/2 tsp
Salt - as required

For the curry:
Onion - 1, big, chopped
Tomato - 2, chopped
Ginger garlic paste - 1 tbsp
Curry leaves - a handful
Ground coconut paste - 1/2 cup
Chilli powder - 2 tsp
Coriander powder - 1 tbsp
Turmeric powder - a pinch
Salt - as required
Fennel seeds - 1 tsp
Oil - for sauteing

Yield - Serves 4-5 persons

Method:

Step 1:
Prepare the meatballs by mixing all the ingredients under meatball section. Shape them into gooseberry size balls. Keep aside.


(I saved some meat mixture and shaped them into kababs for grilling!!!)
Step 2:
Heat the oil in a pan, add fennel seeds. When the seeds start to crackle, add the onions and fry them until translucent. Add the ginger garlic paste and saute them until raw smell is gone, then add the tomatoes. When the tomatoes are soft and cooked, add the turmeric, chilli and coriander powders, salt and 1 cup of water. Stir well, bring it to a boil.


Step 3:
Add the meat balls and cook the curry covered, in medium flame, until the oil separates. Add the coconut paste and further cook it in medium high flame, for few minutes. Switch off the stove. Garnish with coriander leaves if you like.


Serve with hot rice or rotis. Also goes well with idli, dosa or aapam.