Tuesday, October 23, 2012

Mushroom Biriyani

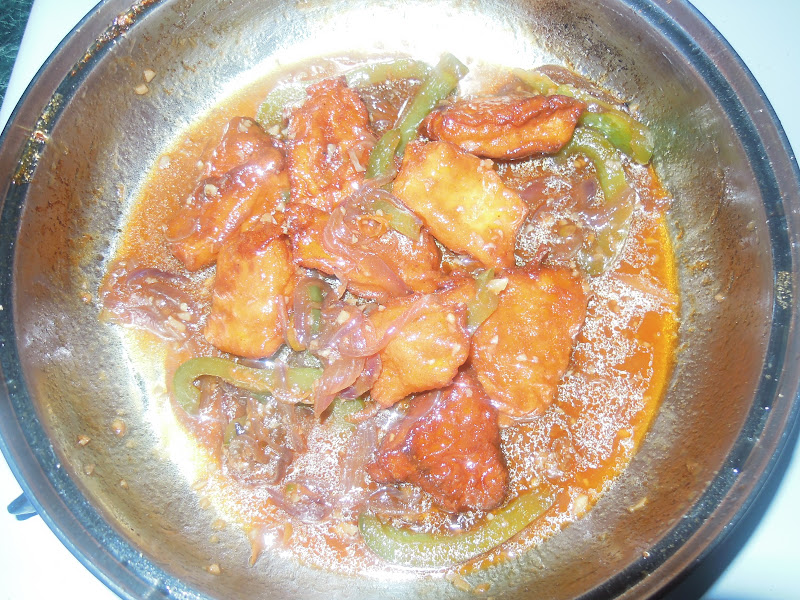
For me, cooking vegetarian is very hard. Actually it's not the cooking that is hard but deciding what to cook really is. If we are having some guests at home, I would be very happy if they are non-vegetarians. Because I could get away with one chicken curry or fish curry and rice. If they are vegetarians, I am doomed. I would always like to do something unusual for my guests. So I try to  think away from the usual recipes. One of the lifesavers is mushroom biriyani. It's a very easy, quick and yummy recipe, I love to make so that I could finish it off in minutes and turn my focus to other items like appetizers, desserts etc., I always make my pulao or biriyani rice in my rice cooker, but if you prefer to fry the rice and vegetables separately and then cook it in the rice cooker, its ok to that also. Taste dosen't change.

Things you'll need:
Basmati rice - 2 cups
Onion - 2, cut lengthwise
Tomato - 1, cut lengthwise
Mushrooms - 1 cup, cubed (I used button mushrooms)
Capsicum or bell pepper - 1, cut lengthwise
Ginger garlic paste - 1 tbsp
Green chillies -  3 or 4 according to your spice tolerance
Mint leaves (optional) - a bunch
Coriander leaves - a handful
Lemon - 1/2
Whole garam masala - Cinnamon - 1 inch stick, cloves - 5, Cardamom - 2, Bay leaves - 2
Chilli powder - 1 tsp
Coriander powder - 1 tsp
Turmeric powder - 1/4 tsp
Salt - as needed
Oil -2 tbsp
Water - 4 cups

Yield - Serves 3 to 4 persons

Method:

Step 1:
Soak the rice for 15 mins.

Step 2:
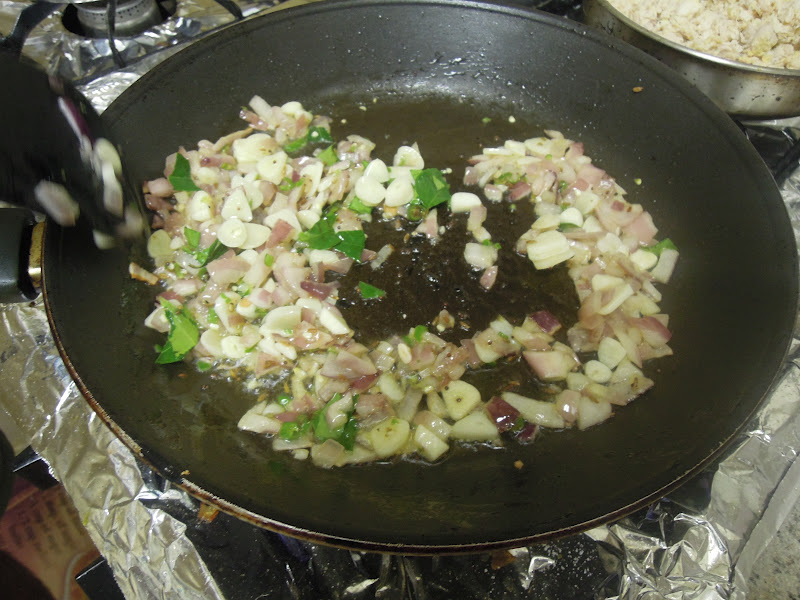
Heat oil in the rice cooker or a pan, add the whole garam masala. When the cloves crackle, add the onions, fry till translucent, add green chillies and ginger garlic paste. Fry till the raw smell of ginger garlic is gone, then add the tomatoes, capsicum and mushroom and mint leaves. Fry until the raw flavor of the vegetables is gone, then add the turmeric, chilli and coriander powders.

Step3:
Add rice and fry until rice is well coated with the mixture. Add water and salt. If frying in a separate pan, transfer the contents to the rice cooker. Squeeze the lemon juice into rice mixture.


Step 4:
When done, garnish with coriander leaves and serve with raita and your favorite curry.

Tip:
You can also cook this in the pressure cooker. Cook in medium heat for two whistles.

Stir-fry Noodles

My daughter is a noodle lover. Although she is a picky eater, we can trust her with noodles every time we go out to eat or having lunch/dinner at a friend's place. From instant noodles to authentic Chinese noodles she likes all kinds of them. If they don't have vegetables..good. If they are spicy..great. If they have chicken...wow!!. But somehow she doesn't appreciate the noodles I make for her at home or for her school lunch. I seriously don't know what's going wrong. I used the same ingredients they mentioned in the chowmein recipes, used thin noodles which she used to like in restaurants, used less vegetables, sometimes none. But she eats only a bit, which I would have forced into her mouth. I am going to still try all noodle recipes I could get and win her appreciation someday. Below is my version of the stir fry noodles recipe. But I would really like to know if someone has a different version of the stir fry noodles to make it taste like those in restaurants. 

Things you'll need:
Chowmein noodles - 1 pack
Carrots - 1/2 cup, diced
Cabbage - 1/2 cup, diced
Capsicum - 1/2, cut lengthwise
Garlic - 5 cloves, minced
Soy sauce - 2 tbsp
Oyster sauce - 1 tbsp
Stir fry sauce - 1 tbsp
Salt - as needed (go easy on the salt since the sauces have salt in them)
Pepper - 1 tsp, crushed or coarsely ground
Oil - 1 tbsp

Yield - Serves 2-3 persons

Method:

Step 1:
Cook the noodles according to package directions. Drain, mix in some oil, and let dry on a plate.
Heat oil in a wok or large pan. Stir fry the vegetables, garlic with salt and pepper, until the vegetables are almost cooked but crunchy.


Step 2:
Add the noodles and stir fry the noodles mixing the vegetables and noodles. Mix the sauces in a bowl by adding little water. Add them to the noodle mixture and stir fry until the noodles are dry and the sauces are well absorbed.

Serve hot with your favorite side.


Tip: Before adding the noodles you could add a scrambled egg to add extra flavor. You could also make it more spicy by adding some chilli sauce.

Friday, September 28, 2012

Chilli fish (gravy)

Indo-chinese recipes are my all time favorite. Whenever I want to take time off from my regular dishes and do something special for dinner or lunch I opt for Indo-chinese food without blinking an eye. Usually it will be a Manchurian and fried rice. But this time I wanted to do a seafood special. Chilli fish is the first thing came to my mind. We usually go for chilli fish with fried rice/noodles when we do a take-away. Somehow I thought it takes a lot of time to prepare it and hence never attempted to give it a try. Yes, it took a bit of my time but it wasn't so complicated as I thought. I made it for a Saturday dinner and served with veggie stir fry noodles.

Things you'll need:
Fish fillets - 2 (tilapia or any firm fish)
Soy sauce - 2tbsp + 2tsp
Chilli sauce - 1tbsp+1tsp
Corn flour -  2 tbsp
Salt - as needed
Food color (orange or red) - a pinch (optional)
Garlic cloves - 3, finely chopped
Onion - 1, cubed or slit lengthwise
Bell pepper (green or mixed colors) - 1 cup, cubed or slit lengthwise
Tomato paste - 1 tsp
Green onions - 2, finely chopped


Oil - for deep frying the fish and sauteing the vegetables

Yield - 2 Servings

Method:

Step1:
Cut the fillets into small pieces. Mix the cornflour, 2 tsp of soy sauce, 1 tsp of chilli sauce, salt and food color (optional) in a bowl.

Step2:
Coat the fish pieces with the corn flour mixture and deep fry them in small batches. Let them sit on a paper towel.

Step3:
Heat a little oil in a pan, saute the onion, garlic and bell pepper, uncovered in medium low, until the vegetables are cooked but little crunchy. Add the tomato paste, 2 tbsp of soy sauce, 1 tbsp of chilli sauce and salt. Bring to a boil.


Step5:
Reduce the heat to low and cook the sauce for a couple of minutes. Add the fillets, mix it well, switch off the stove and garnish with green onions.


Serve it with fried rice or noodles

Tips:
Use dark sesame oil for more authentic effect. You could also use some toasted sesame seeds for garnishing.
If you prefer a thicker gravy, mix 2 tsp of cornflour in  1/4 cup of  water and stir into the boiling gravy. The gravy will thicken in couple of minutes. 

Monday, September 10, 2012

Crochet jewelry

My daughter is changing school this fall. It is the most sad feeling to leave your old school and friends behind and move on. It was almost like a second home for my kid. She loved it there. The teachers were so kind and patient with her and all the kids studying there. I even would wish sometimes we had a school life like hers. I really should appreciate their efforts to bring out the best in each and every child. They certainly did more than I could have done. I wanted to give a small gift of appreciation to the teachers on the last school day for my daughter. I could have easily brought something in a store, but I wanted to put some effort in making the gift myself, to respect their efforts. So I chose to do some crochet jewelry. I got some satin and thread chains and fish hooks, and crochet thread and viewed a lot of patterns to finally come up with these jewelry

HEART SHAPED PENDANT AND EARRINGS

This is a very simple pattern, but it took me a little while to master as I am new to crocheting with crochet threads which are much thinner than the regular yarns. I used a size 10 thread and 2.5 mm hook.


FLOWER PENDANT AND EARRINGS

This is also a beautiful pattern as the previous one. With the same thread and hook, I made the pendant and earrings in less than an hour.


SUMMER BRACELETS:

These bracelets were made with my own pattern. I just started blank and started inventing the pattern on the go. It might not be a masterpiece but a decent one for a beginner. I used 4 ply yarn and 5 mm hook for this pattern.


Friday, July 20, 2012

Vegetable and cheese crepe

For this recipe the credit goes completely to my husband, because he was the one who attempted to try this one, and he makes this each time we feel like having the crepe :). We use Bisquick pancake mix for this recipe but it can also be done with all purpose flour with some baking powder and baking soda. Treat yourself with restaurant style crepe when you are not in a mood for regular food.

Things you'll need:
Bisquick pancake mix/ all purpose flour - 1 cup
Egg - 1 (alternatively you can use 1/3 cup of egg white)
Milk or water - just enough to prepare the batter
Shredded cheddar cheese - 1/4 cup
Onion - 1, small, chopped
Sun-dried tomatoes (optional) - 2 ,chopped
Mixed vegetables (carrot, beans, broccoli, mushroom, peas, bell pepper) - 1 cup
Salt - as per taste
Butter - as required

Yield - 2 Crepes

Method:

Step1:
Prepare the batter by mixing the Bisquick mix/ all purpose flour with milk/water. If using all purpose flour add salt, baking powder and baking soda, a pinch of each.

Step2:
Stir fry the onions, tomatoes (optional) and mixed vegetables with salt and pepper until the vegetables are cooked. Beat the egg with little salt and pepper.


Step3:
Pour a ladle full of batter on a flat pan or tava greased with some butter, in medium flame. Spread the batter into a crepe. When the upper side of the crepe is dry, pour some egg mixture and spread. When the egg is cooked, spread some of the vegetables and shredded cheese. Fold the crepe and serve hot with fries or chips.


Sunday, June 24, 2012

Simple aval (poha) upma

Whenever we have a late and heavy lunch, or if we go somewhere in the weekend and come back late in the evening, we prefer simple and light dinner. Poha upma would be our choice most of the times. I do it with just onions and green chillies or additionally with some veggies if I have the time and the veggies. This make-in minutes meal could also be prepared as evening snacks for kids with veggies and coarsely powdered nuts.

Things you'll need:
Aval (poha) - 1 cup
Onion - 1, finely chopped
Green chillies - 2, finely chopped
Curry leaves - hand full
Vegetables (carrot, peas, potato) - 1/2 cup (If using potato, cook and cube it before adding to upma)
Salt - to taste
Coriander leaves - few sprigs, for garnishing
Cashew nut/peanut powder  (optional) - 2 tsp

For tempering :
Oil - 1 tbsp
Mustard seeds - 1 tsp
Urad dal - 1tsp
Cashew nuts - few, broken
Turmeric powder - 1 tsp

Yield - 2 Servings

Method:

Step1:
Soak the aval (poha) in 3 cups of warm water for half an hour or until it turns soft. Drain and keep aside.

Step2:
Heat oil in a pa and add the tempering ingredients. When the mustard seeds starts bursting, add the onions green chillies and curry leaves. Fry till the onions turn translucent. Add the vegetables and salt, cook them in a slow flame until the veggies are almost cooked.

Step3:
Add poha and fry until the moisture in the poha is absorbed and the mixture is dry. Switch off the stove. Garnish with coriander leaves and nut powder (optional)


Serve with your favorite pickle or chutney (We have it with sweet and spicy mango pickle ) 

Friday, June 15, 2012

Sura puttu..(Spicy shark hash)

This recipe was one of my favorite seafood recipes since I remember. I still remember my dad getting the whole shark from the fish market, my mom cleaning and cutting the shark, and of course preparing the sura puttu. As a child I didn't really appreciate the effort that's behind this wonderful recipe. I only enjoyed the end product. Only after I started cooking, did I realize the dedication and effort behind each food we prepare and the satisfaction we get when the dish comes so well and gets praised by others. Luckily for me, after coming to US, cooking is not always done from scratch, because from meat to vegetables we get most of them them pre-cut or frozen. We sometime get shark fillets in our nearby grocery store. It doesn't taste as good as fresh shark but something is better than nothing. So we doesn't miss a chance when we see fresh (partially) shark fillets in the store. Sura puttu is always sura puttu, fresh or not.
Now to the recipe..

Things you'll need:
Shark - 1 lb
Onion - 2, medium, chopped
Garlic - 10-15 cloves, minced (or more if you like the garlic flavor)
Green chillies - 5, minced
Curry leaves - a handful
Coriander leaves - for garnishing
Salt - to taste
Turmeric powder - 1 tsp
Oil - 2 tbsp


Yield - 3-4 Servings

Method:

Step1:
Clean and cut the shark into medium size pieces. In a pan, bring two cups of water to boil. Add the shark pieces with the turmeric powder and cook covered for five mins or couple of mins more. That's enough for the shark to become soft. (If it stays rubbery even after 10 mins, there's no point in using them for sura puttu ). Let it cool.

Step2:
Remove the skin from the shark pieces, if any, and gently shred the shark pieces with your hands. If you find bones in the shark, don't throw them away. It will enhance the flavor of the sura puttu.

Step3:
In a deep frying pan, heat the oil, add the onions and fry until golden brown. Add the green chillies, garlic and  curry leaves. Add a small pinch of turmeric powder. Now add the shark pieces and salt.
Mix well and cook for few minutes until the sura puttu is dry.


Serve with rice and your choice of curry or rasam.